HomeHow It WorksFeaturesPricingFAQSupport Sign in ↓ Download for Windows
HOW IT WORKS

You add the source. Jolnova handles the repetitive work.

Live sources are tracked in the background, links and local files are processed on demand, and everything ends up in one review queue.

SourceScheduleCaptureDetect FormatReviewExport
STEP 01

Add or choose a source

Paste a Kick, Twitch or TikTok channel to track it continuously, drop in a YouTube or VOD link for a one-off job, or pick a video that is already on your computer.

  • Kick channel — live tracking
  • Twitch channel — live tracking
  • TikTok account — live tracking
  • YouTube, Kick VOD and Twitch VOD links
  • Local MP4, MKV, MOV and WEBM files
Local files are read in place. Jolnova never moves or deletes your originals.
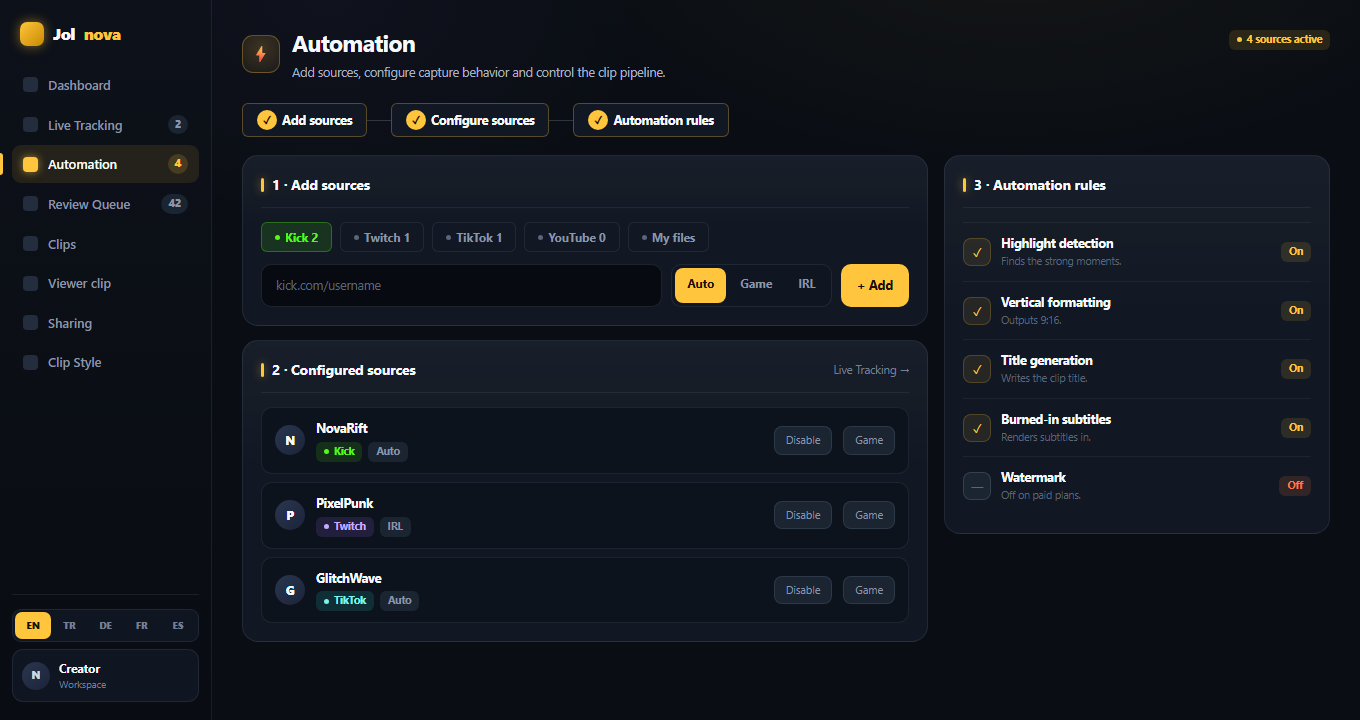
Automation
Automation page with the three-step source setup
STEP 02

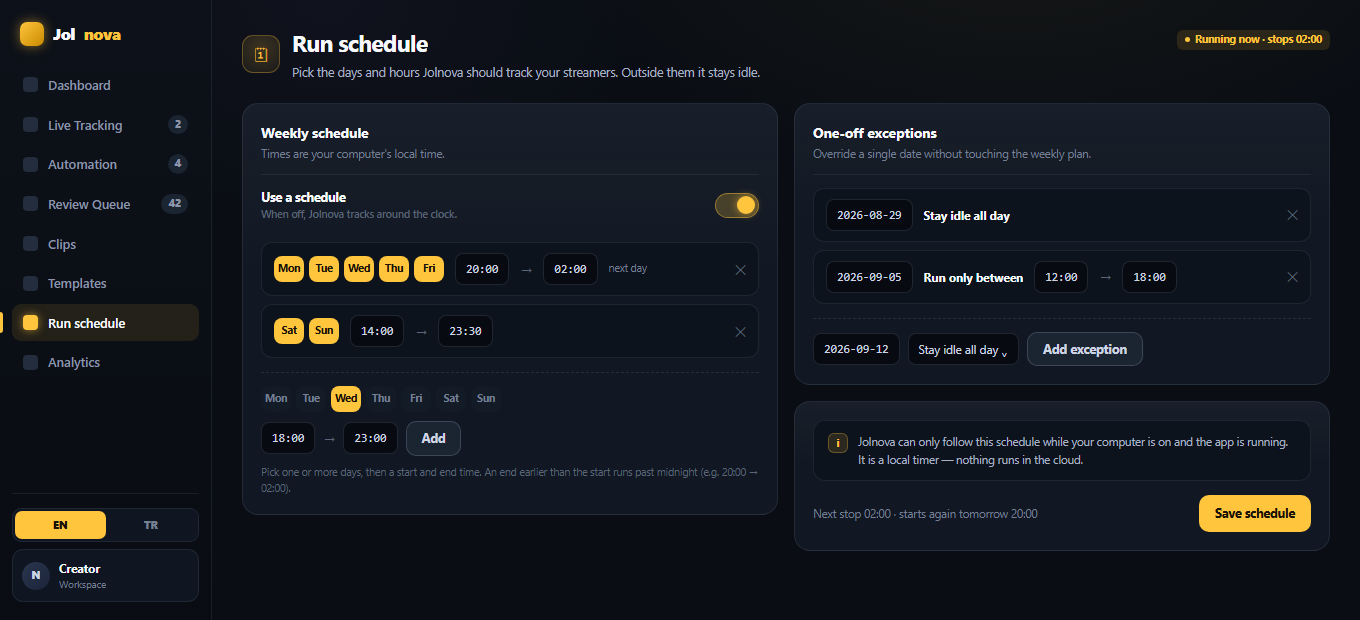
Set the hours it may work

Streamers go live at certain hours, so there is no point tracking an empty channel all week. Give Jolnova a weekly plan and it stays idle outside it — or leave the schedule off and it tracks around the clock.

  • Weekly time ranges, several days per range
  • Ranges that pass midnight, like 20:00 to 02:00
  • One-off exceptions for a single date
  • A live recording is roughly 5.6 GB per stream per hour, so this is real disk saved
It is a local timer. Jolnova follows the schedule while your computer is on and the app is running — nothing runs in the cloud.
Run schedule
Run schedule with a weekly plan and one-off exceptions
STEP 03

Capture or process the video

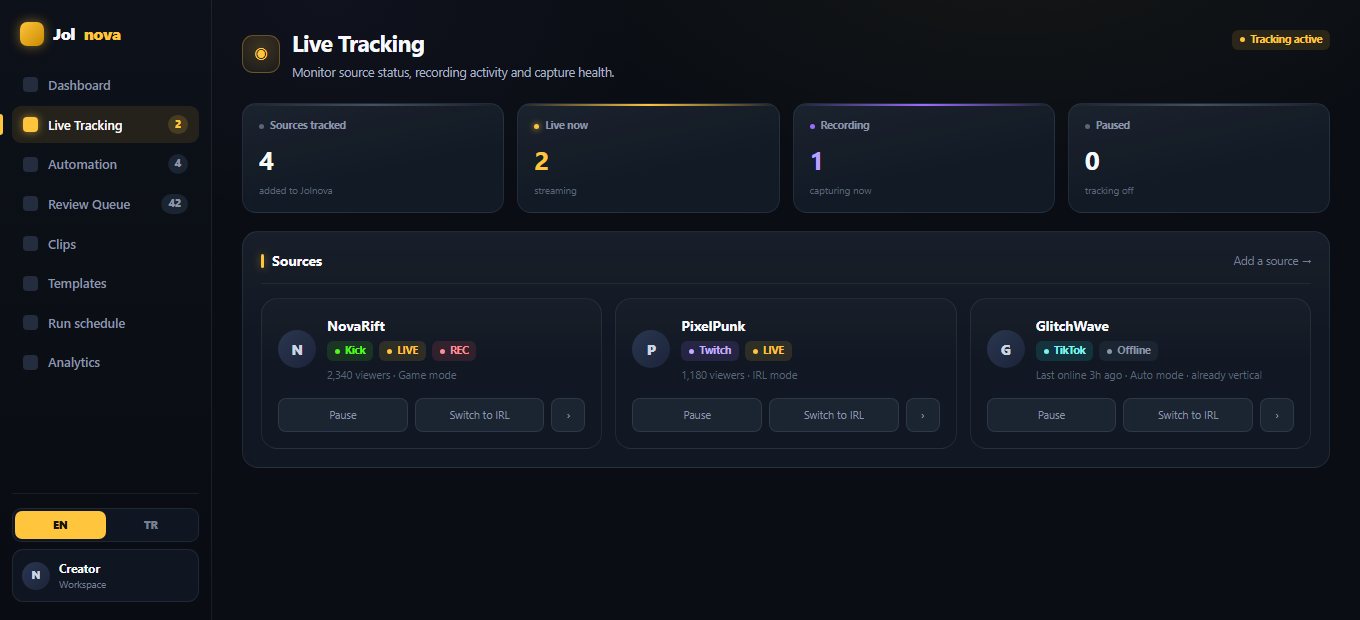
Tracked channels are checked on a schedule. When one goes live, Jolnova starts recording without asking. Links and files skip that step and go straight into processing.

  • Recording starts automatically for live sources
  • Several streams at once — 1 on Starter, 2 on Creator, 4 on Pro
  • Links are downloaded, then processed
  • Local files are read directly from disk
Live Tracking
Live tracking view showing tracked sources and recording state
STEP 04

Find the candidate moments

Jolnova reads three signals from the recording — how dense the chat gets, where the audio jumps, and what is actually being said — and cuts a candidate where they line up. All three run on your own machine and cost nothing per clip.

  • Chat density against the calm baseline
  • Audio spikes: laughter, shouting, sudden loudness
  • Speech content from the transcript
  • Sensitivity is a setting: Few, Balanced or Many
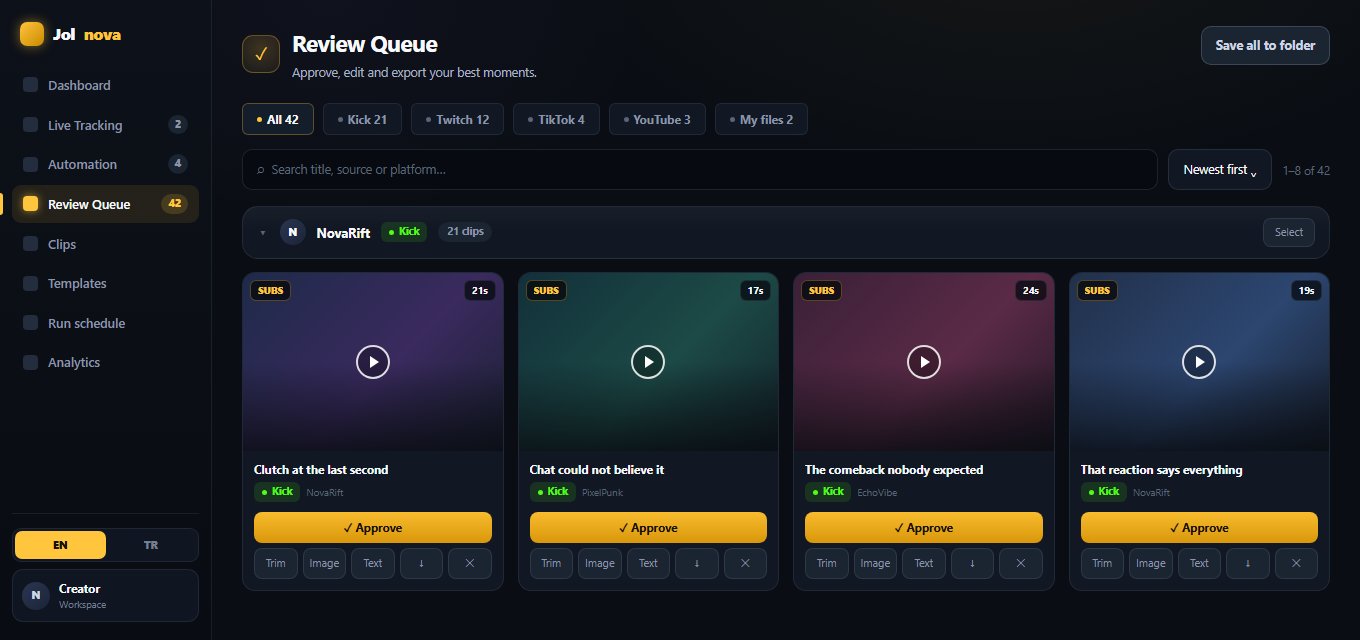
No clip carries an AI score or a quality grade. Every candidate goes to the review queue and you decide what leaves it.
Review Queue
Review queue with generated clips ready for approval
STEP 05

Prepare vertical output

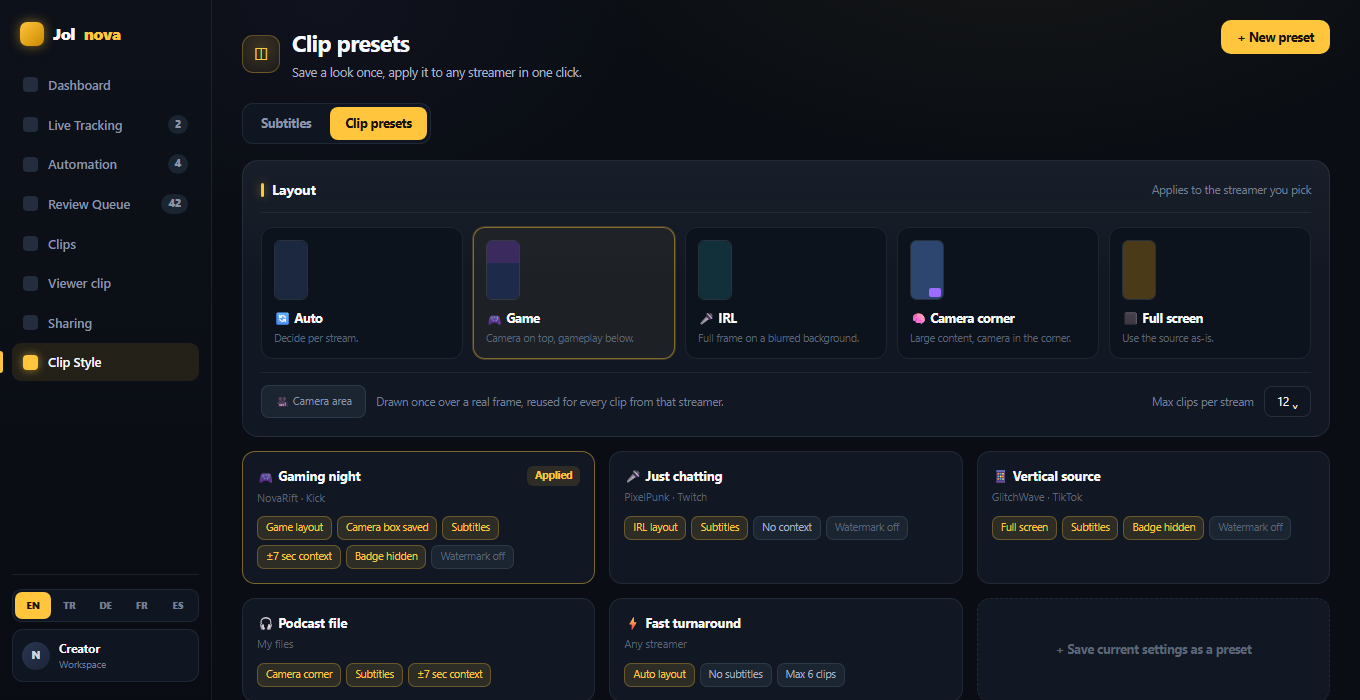
Each moment is cut and reframed to 9:16 using the layout you picked for that streamer — or the one saved in a clip preset.

  • Auto — decide per stream
  • Game — camera on top, gameplay below
  • IRL — full frame on a blurred background
  • Camera corner — large content, camera in the corner
  • Full screen — use the source as it is
Clip presets
Clip presets with layout options and saved preset cards
STEP 06

Caption it — and correct what was misheard

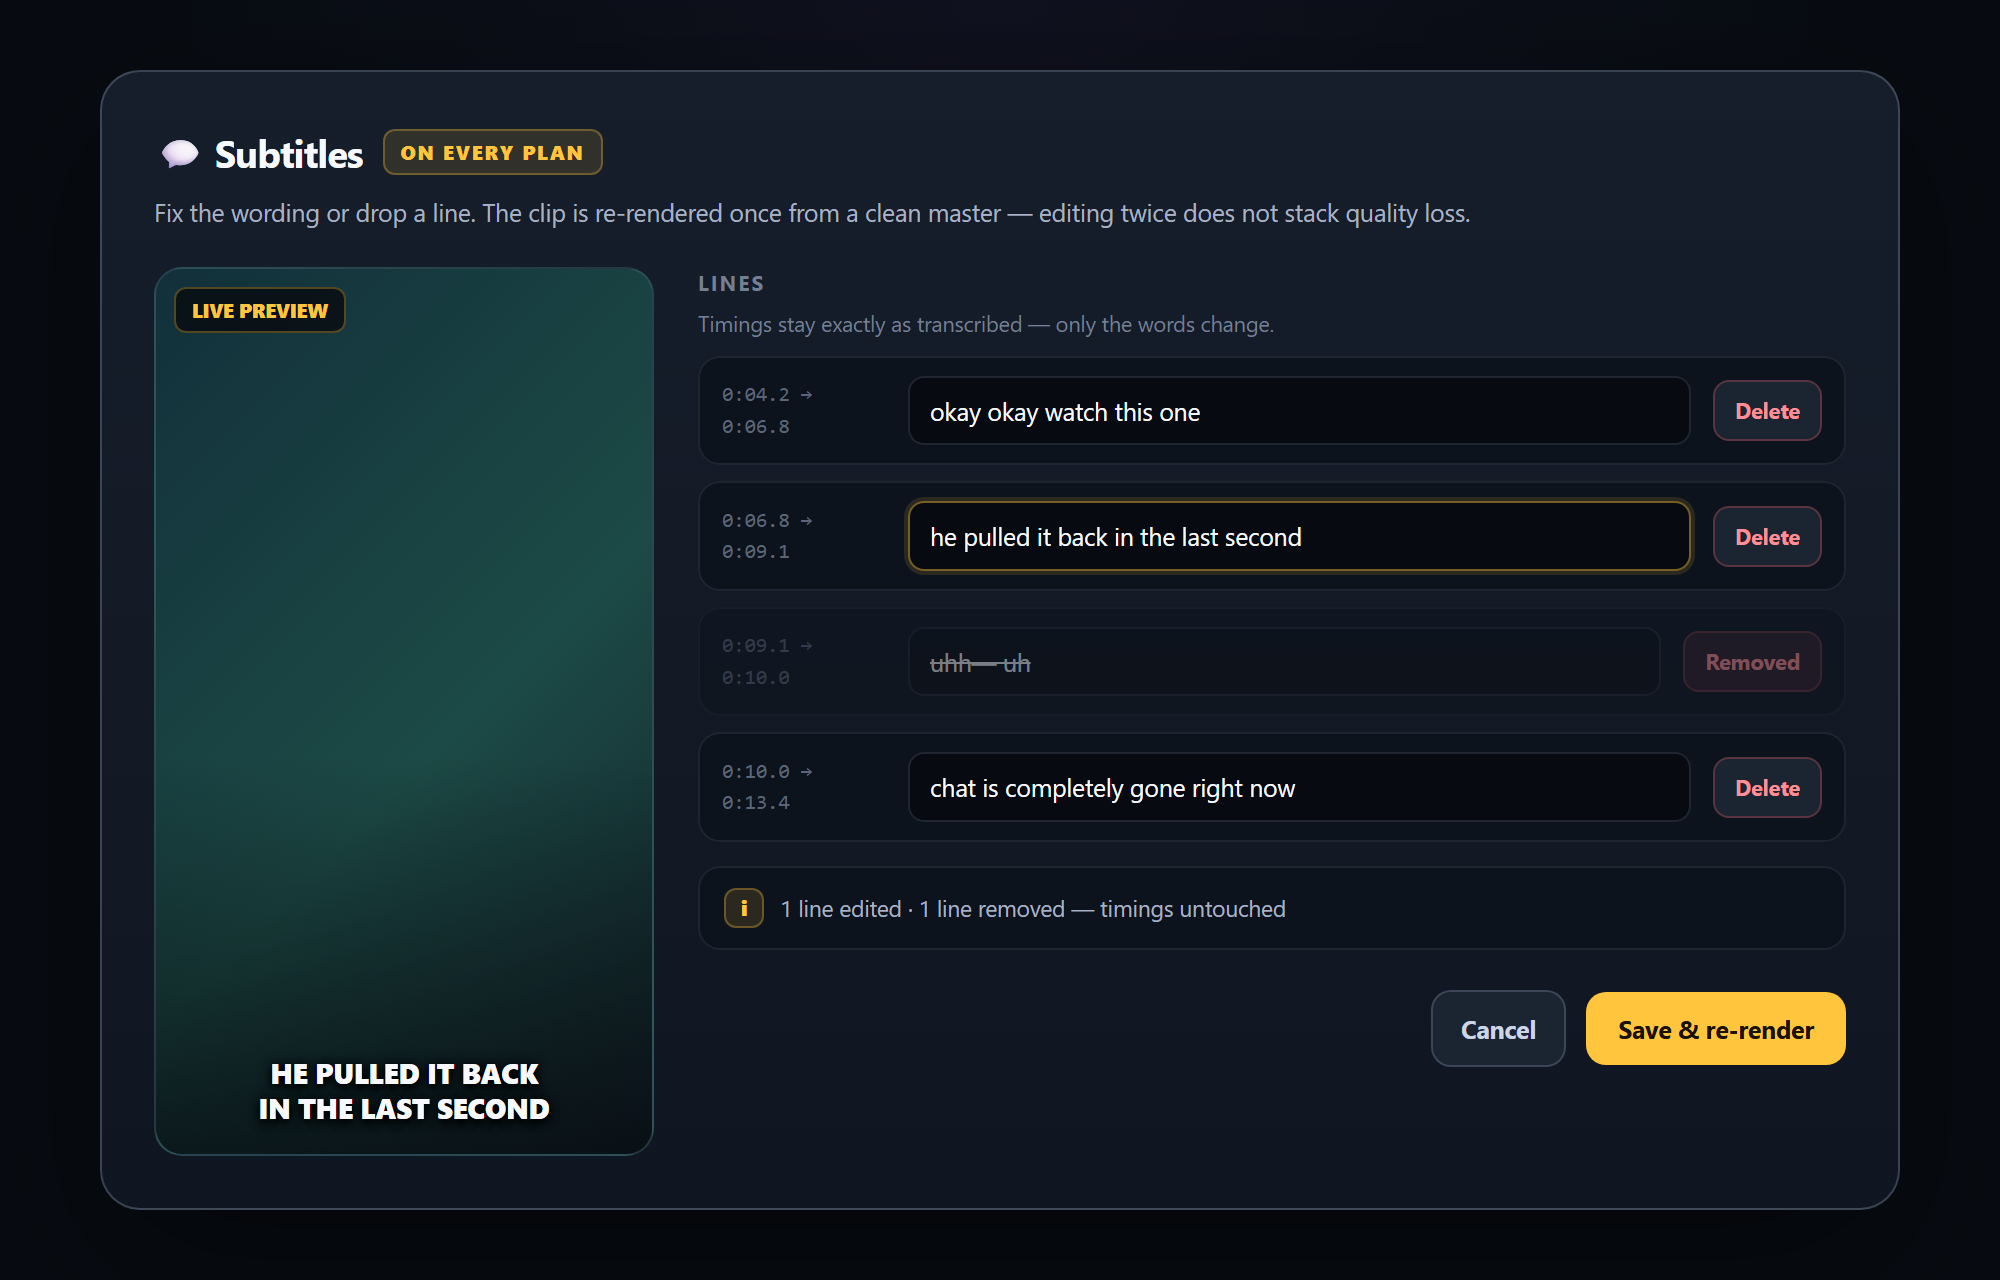
Speech is transcribed and burned into the video in the same encode. Transcription is never perfect, so every line stays editable: fix the wording, or delete a line you do not want on screen.

  • Transcribed, burned-in subtitles
  • Edit or delete any subtitle line — on every plan
  • Timings stay exactly as transcribed, only the words change
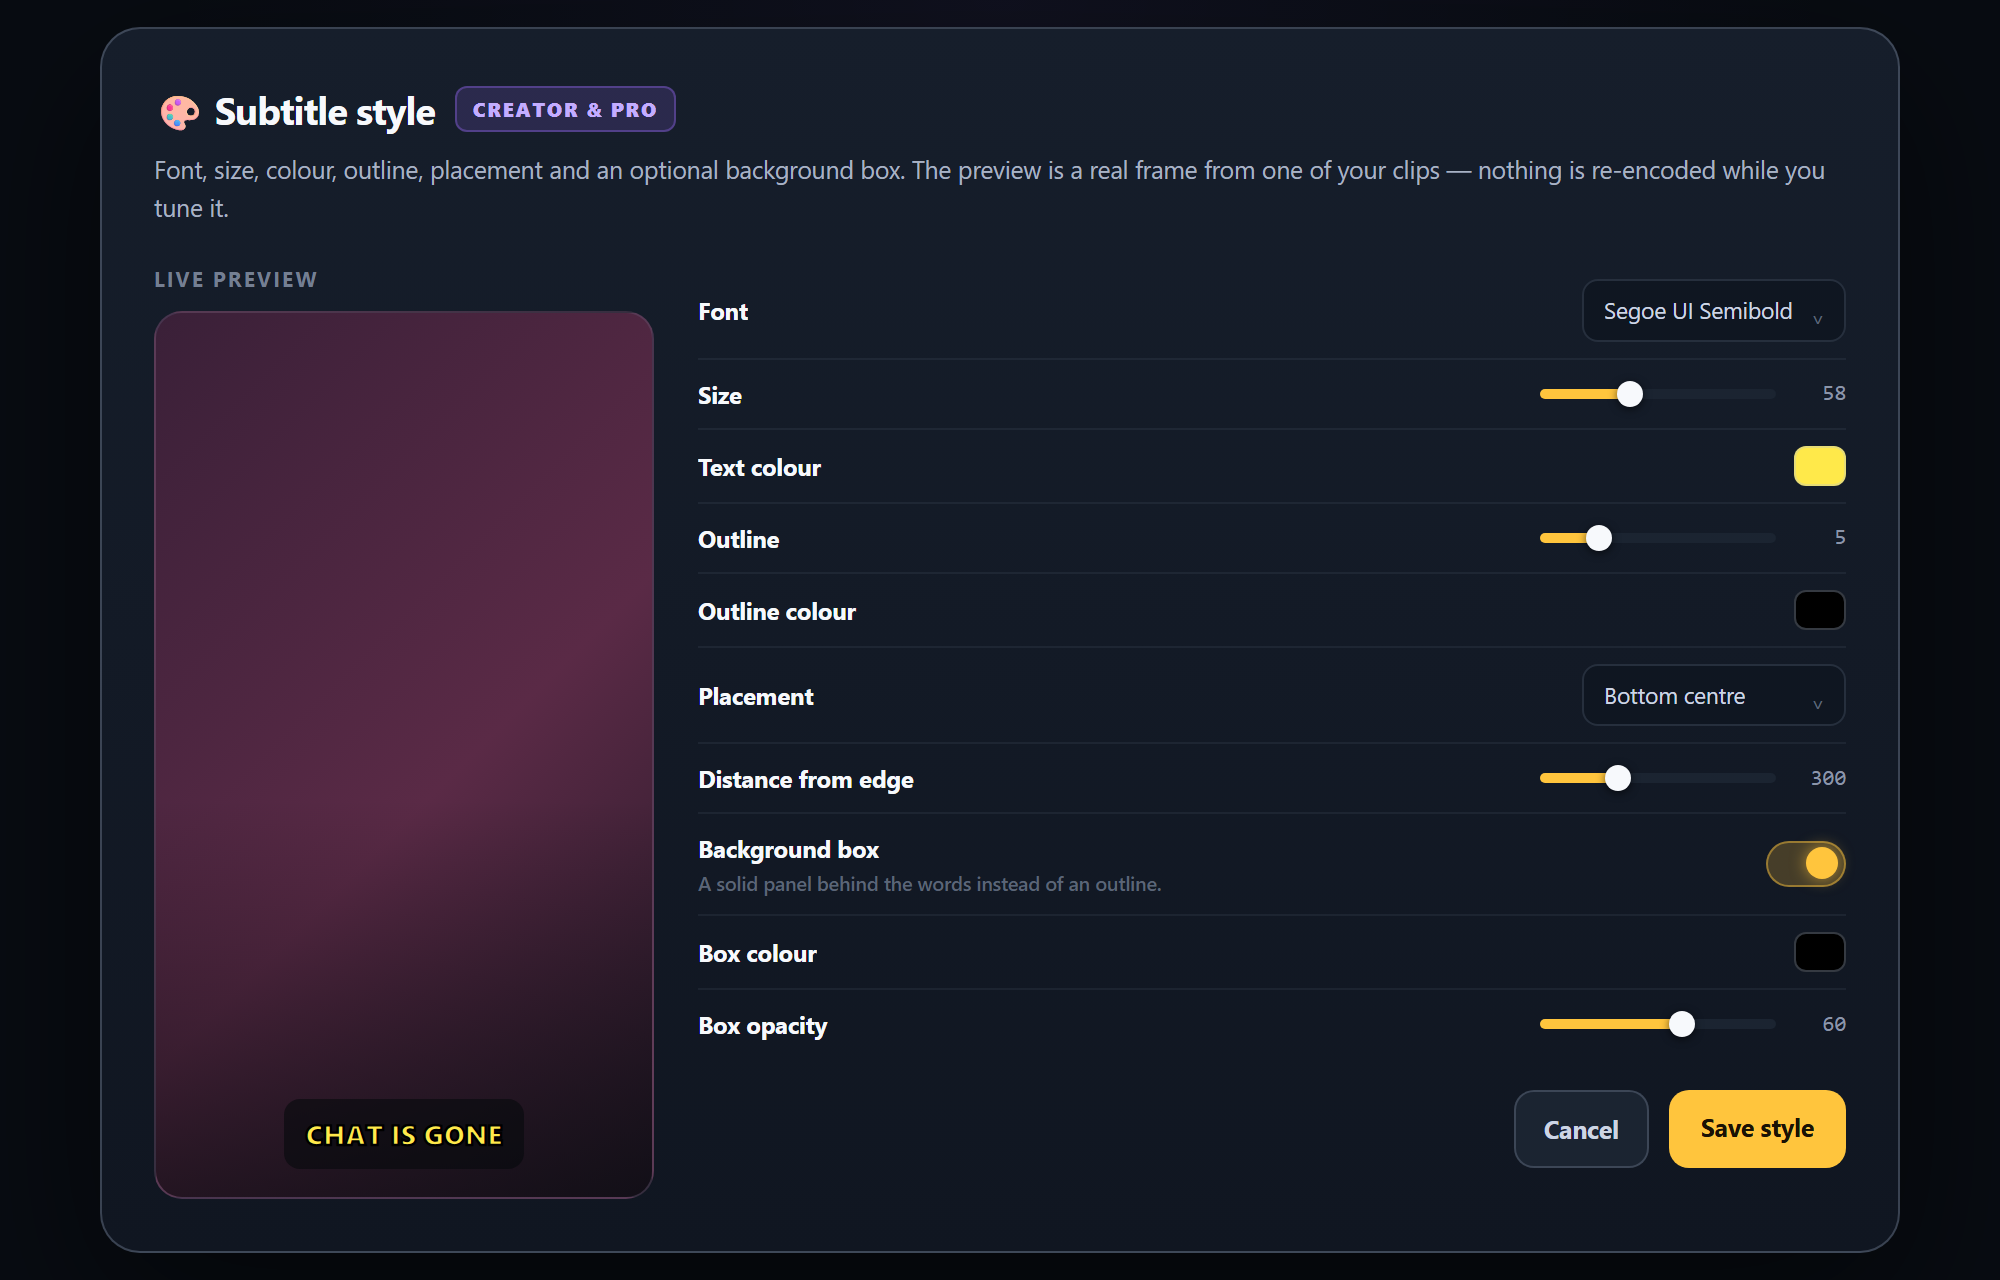
  • Font, size, colour, outline, placement and background box on Creator and Pro
Saving re-renders the clip once from a clean master, so correcting the text twice does not stack quality loss.
Subtitle text
Subtitle editor with the transcribed lines open for editing
STEP 07

Write the clip metadata

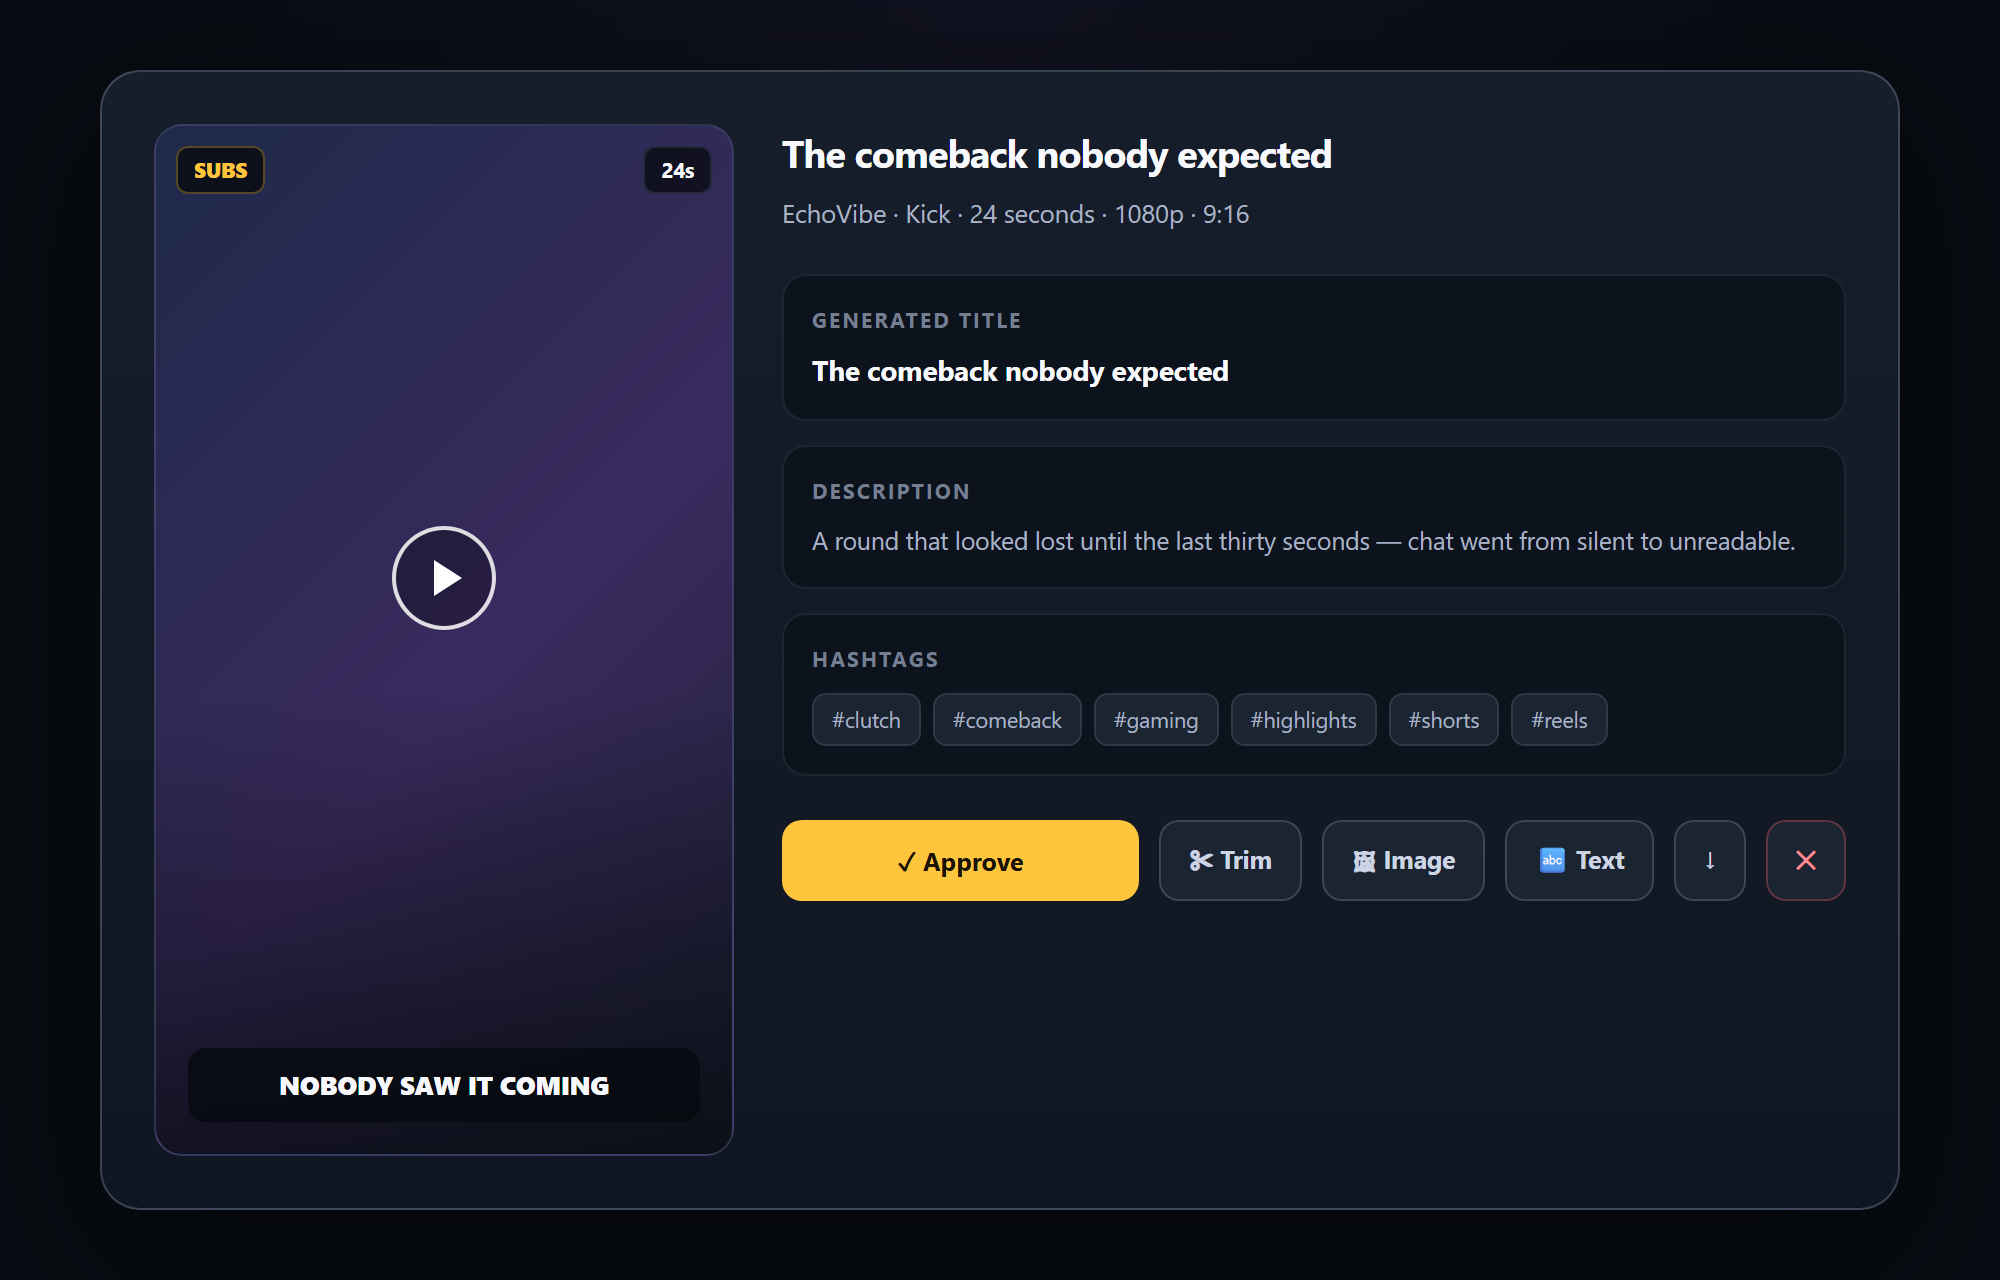
When you approve a clip, a title is written from what actually happens in it — so you are not renaming files by hand. A description and hashtags come with it.

  • Titles written on approval
  • Description and hashtag suggestions
  • Optional text or image overlay you can add yourself
The transcript and a short chat summary are the only things that leave your computer. Your video is never uploaded.
Clip detail
Clip detail with generated title, description and hashtags
STEP 08

Fine-tune the clip yourself

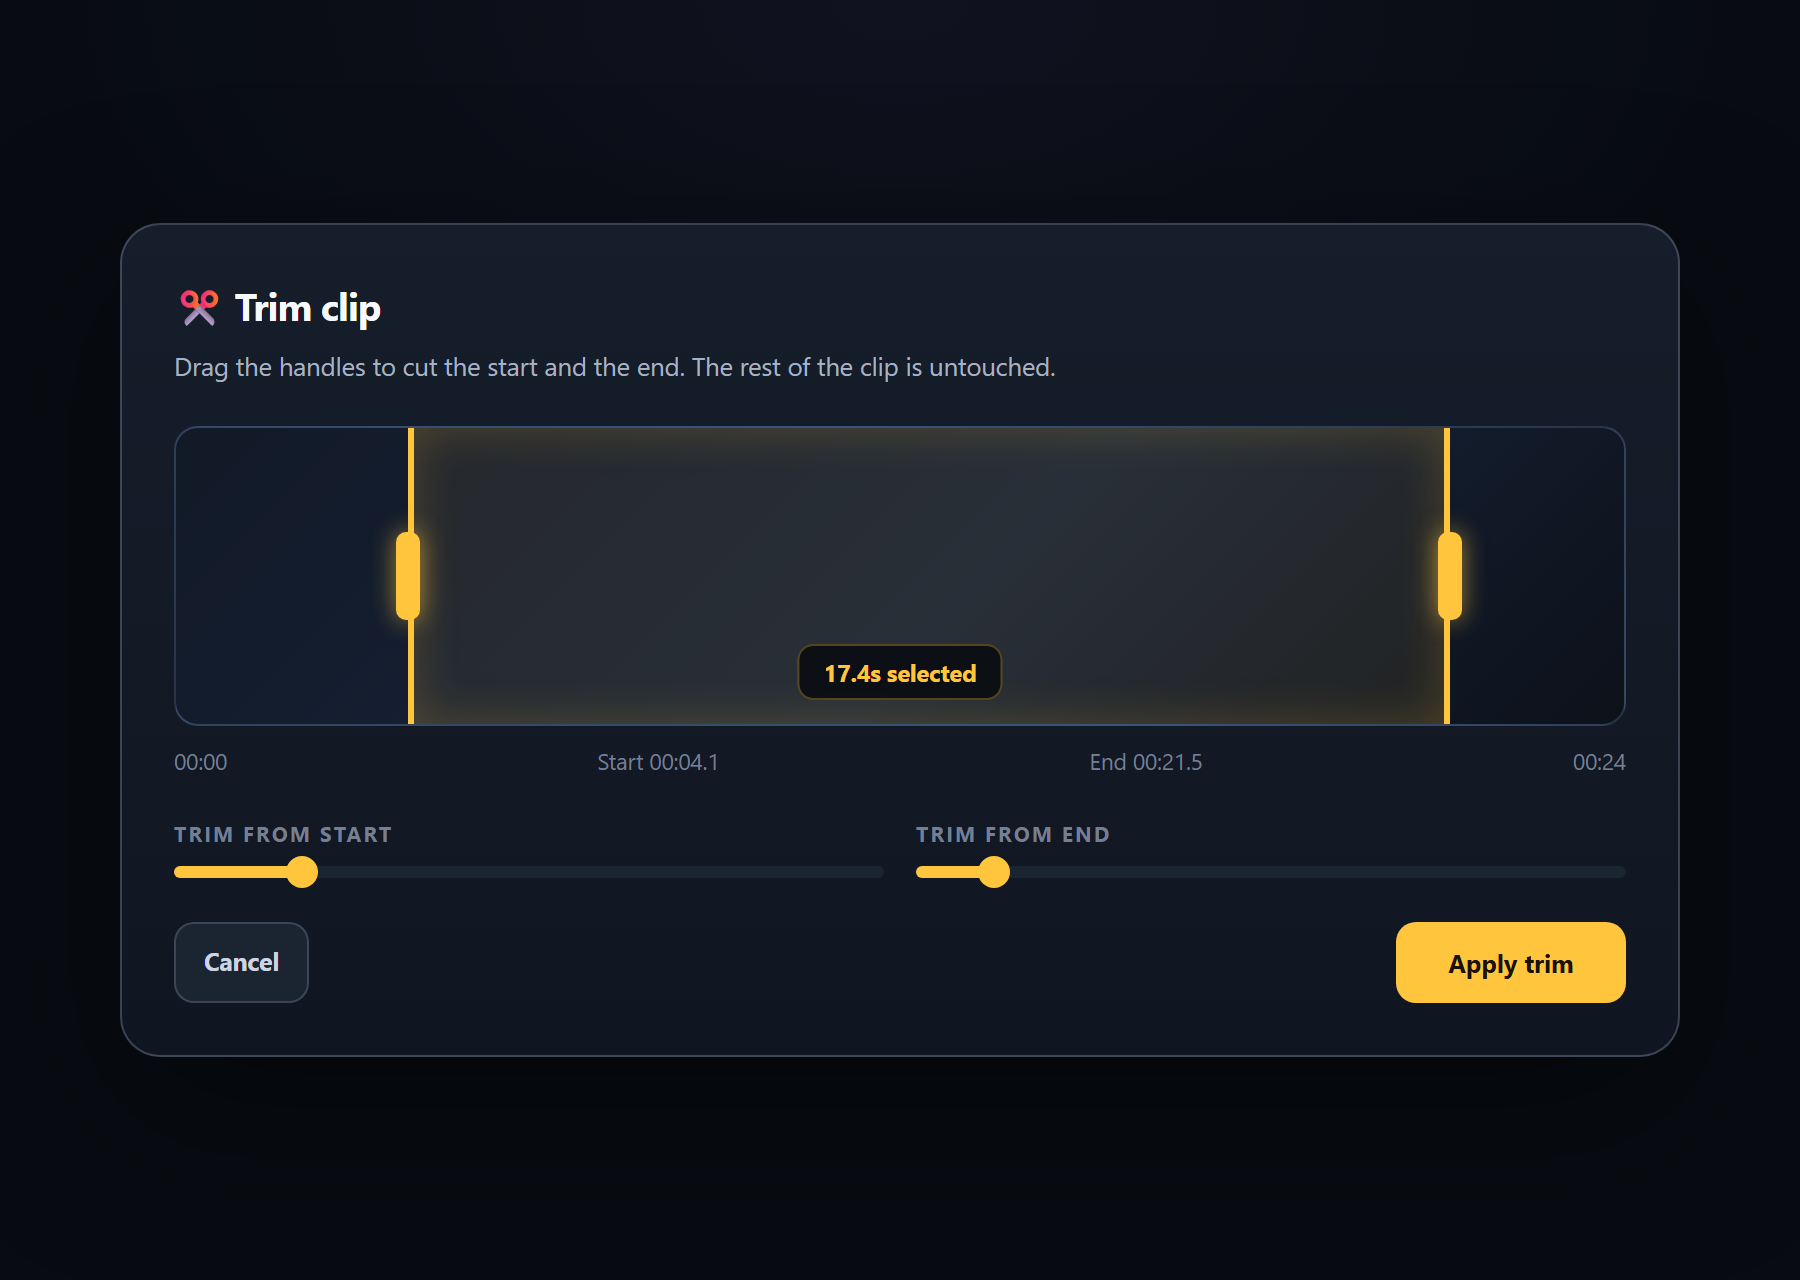
Before you approve anything you can cut the ends, drop a logo on the frame or write a line across the video. Every change is applied to the original clip, so editing never costs you quality.

  • Trim the start and the end with two handles
  • Pull up to seven extra seconds back from the recording on Creator and Pro
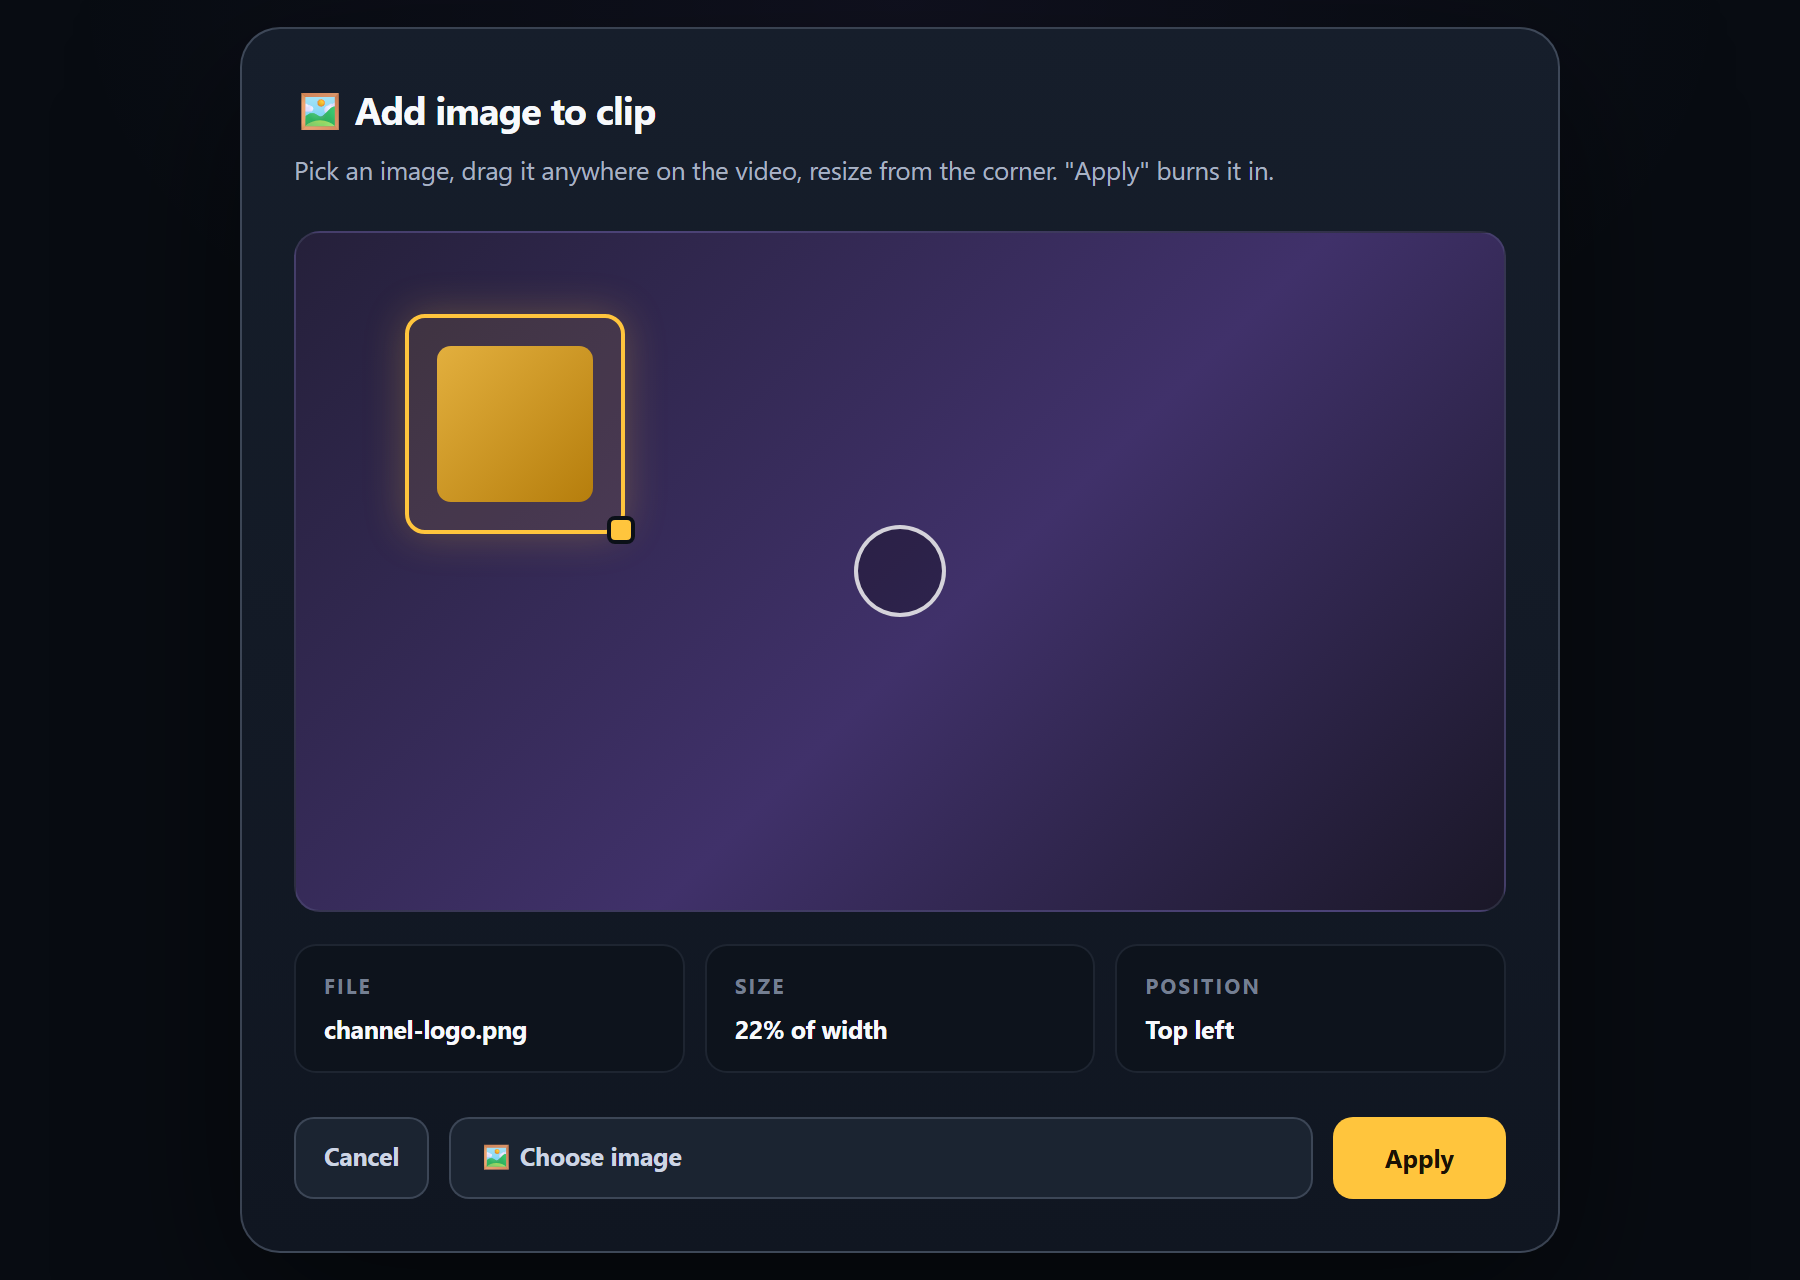
  • Place an image anywhere and resize it
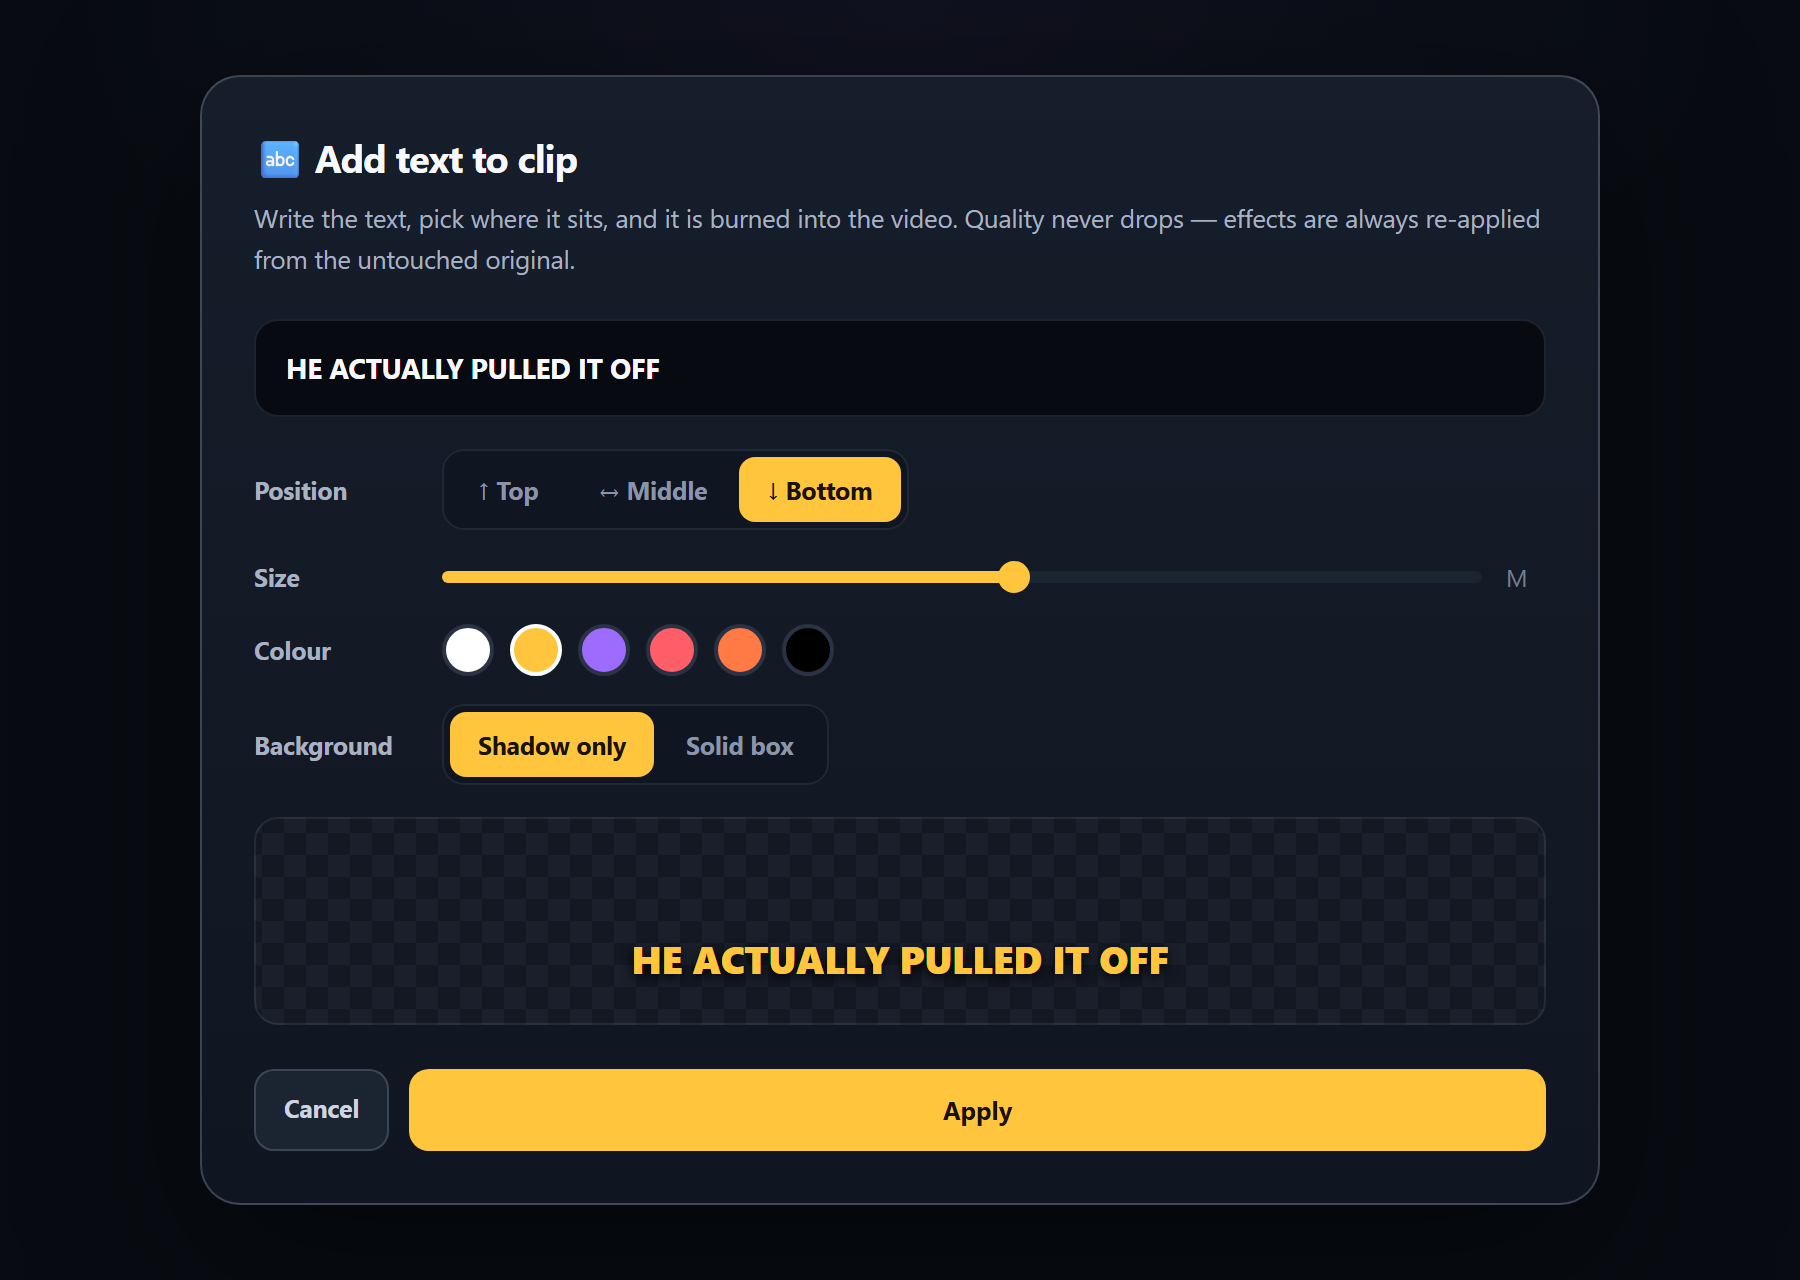
  • Add text with position, size, colour and background
  • Remove any effect and get the clean clip back
Trim clip
Trim editor with start and end handles over the clip timeline
STEP 09

Review and export

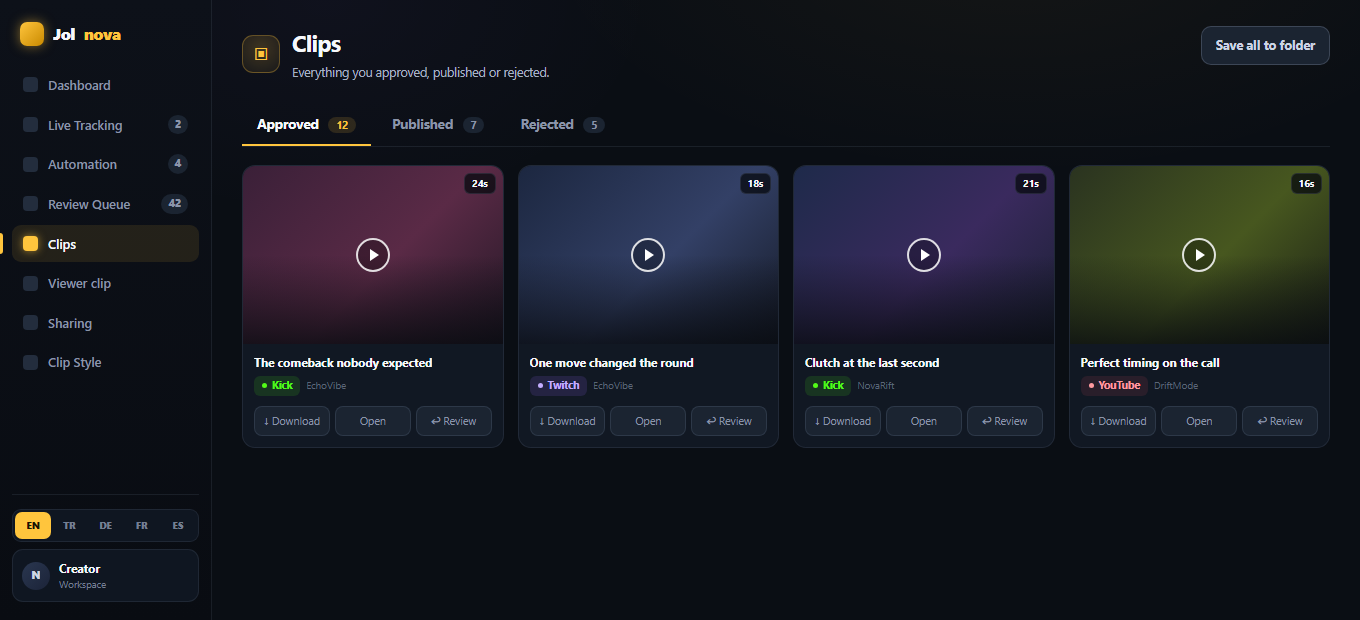
Open the review queue, work through the candidates, and approve the ones worth posting. Approved clips download in HD to whichever folder you choose.

  • Approve or reject in one click
  • Undo a rejection at any time
  • Watermark on or off on every paid plan
  • Download one clip or a whole selection
  • Choose the destination folder yourself
Download the finished clip, or connect a YouTube account and schedule it on the calendar. Nothing goes out that you did not approve yourself.
Clips library
Clips library with approved, published and rejected tabs
THE EDITOR

The four tools you actually use.

They sit on the clip itself — open a clip, change it, approve it. There is no separate editing project to manage.

Subtitle text
Subtitle editor with the transcribed lines open for editing

Subtitle text

EVERY PLAN

Fix a misheard word or drop a line. Timings stay exactly as transcribed.

Subtitle style
Subtitle style panel with font, size, colour, outline and placement controls

Subtitle style

CREATOR & PRO

Font, size, colour, outline, placement and an optional background box.

Trim
Trim editor with start and end handles

Trim

Drag the two handles until the clip starts and ends exactly where the moment does.

Image
Image overlay being dragged and resized on the video

Image overlay

Drag a logo or badge onto the frame, resize it from the corner, apply.

Text
Text overlay editor with position, size and colour controls

Text overlay

Write a hook, choose where it sits and whether it gets a box behind it.

Effects are always re-applied from the untouched original, so adding and removing them never degrades the video.

Ready to build your clip workflow?

Install Jolnova, add one source, and let the first clips arrive on their own.

The free trial runs for 3 days or 50 clips, whichever comes first, with the Jolnova watermark and 720p export.